Monday, June 30, 2014

Simply Oh Baby

I love when I can get two for one. The other day a friend asked if I had any new daddy cards. Her son is finally giving her a grandchild. It just so happened that the challenge this week on the card concept is:

OH BABY!


I went on the internet looking for baby daddy stuff and came across a T shirt that I liked. I dragged the image into my design studio, traced it, created the daddy to be letters and cut them on my cameo out of black cardstock.

Since the negative was so perfectly aligned, it is not always so, I decided to make two cards. Both clean and simple. I dropped one off in my friend's paper box this morning and the other I plan to send to the father of my future grandchild.

Oh Baby, it could not be more simple than that.

Thanks for stopping by! Comment if you wish. We do like comments.


Sunday, June 29, 2014

Happy Birds

I stopped in at Tuesday Morning on Friday. I like to check out their clearance section and art supplies for good deals. I came across a couple of very large stamps and Bazzill cardstock at a very cheap price.

One of the stamps was a pair of cardinals so I used them with markers and spritz on watercolor paper. I learned this technique in a recent Watercolor class. One layer of color and multiple spritz of water you can get several stamps of varying intensity. It is a fun technique.

I decided to use one of the prints for a thank you card. I went into my stamp drawer stash and pulled out the Simon Says October card kit set "giving thanks". I love the tweet line stamps.


I added some distress inks, pattern paper, black cardstock accents and a few black gemstones. Oh happy birds.

Thanks for stopping by today.


Tuesday, June 24, 2014

S-T-R-E-T-C-H-I-N-G Stamps

I took on a completely different project this week on stretching stamps.


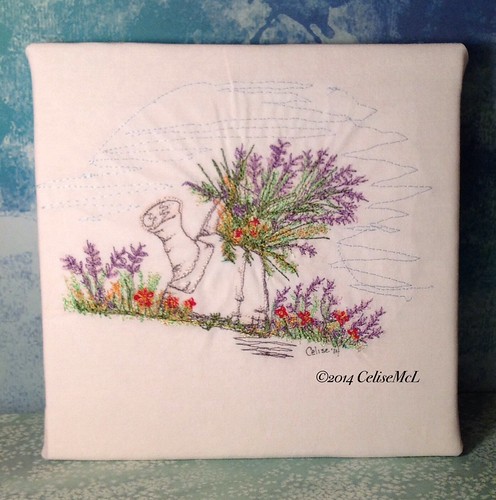
I created a thread art canvas using Art Impressions stamps. These stamps were intended for watercolor, but I stretched it outside the box and used thread instead.

I started with a stamped image on sketch paper using Jumbo Water Can, Blue Bells, WC Tiny Vine, Wild Grass and Flower Border. This was to decide how I wanted it to look.


Then I used Memento Desert Storm dye ink to create the same image on white cotton fabric. I chose a very light ink so it would be visible, but easily covered.

Then I applied a stabilizer to the back of my fabric using a very hot dry iron. The stabilizer is important to keep the fabric from stretching or bunching. Afterwards I secured the piece in an 8 inch embroidering hoop.

The hoop is placed such that the fabric lays flat. It gives extra stability to keep the fabric in place and acts as a steering wheel for guidance.

I replaced the regular presser foot with a free motion foot and lowered the feed dog pressure plate. The bobbin works best with a neutral color such as grey and the machine is threaded with whatever colors needed for the project.

One at a time.

I set the stitch length to .5. The first stitch should be done manually to pull the bobbin thread to the top. That avoids a mess underneath. When stopping and starting new threads always stitch in place 3 or 4 times to lock it in. I stitched very slowly and moved the hoop to guide the stitches.

When it was done, I backed the piece with a fleece and mounted onto a wooden frame.

Thanks for stopping by.


Monday, June 23, 2014

Box card

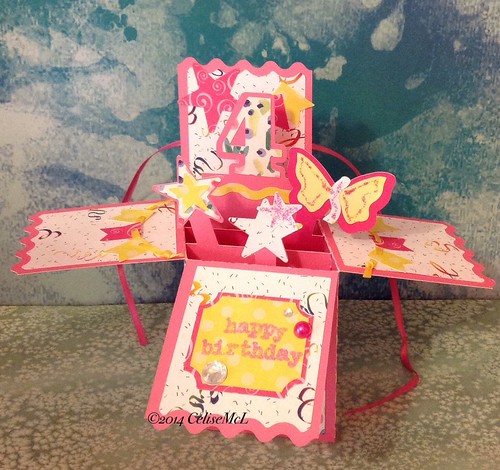
I created my first box card with the silhouette cameo. I downloaded the cut file from the online store and watched a couple of videos to see how they were made.

My #2 grand daughter turns four next month and I wanted to make a special card for her. She loves books and the color purple, so I plan to make a box card with those attributes.

This was my practice example. TEDIOUS. So many pieces!


It does lie flat, if you make it correctly and fits into an A2 envelope. But after hours of cutting and gluing I had this horrible vision that upon opening the envelope she would rip open the card as well destroying every seam and cutesy little pop-up. Last year I made her a card and she carried it around with her all day, it didn't fare well after a dip in the pool.

So I thought instructions might be important. The extra ribbon was adhered at the back of tallest panel and then tied with a tag. Once untied, the sides should flop down and the center pieces pop up. (In theory)

Now I know how to make them, but I cannot see myself spending hours on end coming up with creative ideas for these type of cards. They are cute, but, as a rule, I don't do cute. But now I have a cute Pink 4 yr old birthday card for someone. Know anyone turning 4 who likes pink? It's yours.

Want to subscribe to my blog? You can sign up at the very bottom of this page. You won't miss any of my antics.

Thursday, June 19, 2014

She holds the key

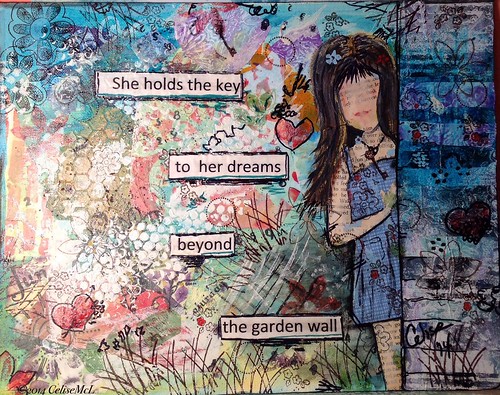
I took a few days from card making to concentrate on a mixed media canvas that I couldn't get out of my head. I painted the background in blues then applied lots of paper pieces that my friend and I created last month using a Gelli plate. I knew I wanted a girl figure to be partially behind a wall, so one side was a series of strips aligned one atop each other to create the illusion of a wall.


I then used various stamps in black and white inks and used an ink spritz. Then I toned it down a bit with a yellow wash before adding my figure. I cut a head, torso, arm, leg and hand from torn book pages and a dress from a blue plaid card stock. I had to use tape on the back to adhere the pieces in their proper place and order. Once I was satisfied I used matt finish to show only part of her as though she was behind this wall.

But I felt she got lost in the busy background so I used a bubble stencil to apply lots of off white, more stamps in brown with red and light blue paint accents. The hair was painted in yellow, then brown, then black then more beige. Lastly I adhered the words and applied the black accents. It's a garden and she's peering out from behind the garden wall.

Around her neck she holds the key. Will she come out and use it?


Thursday, June 12, 2014

Dogs on a Beach run


I have a close friend I met 10 years ago when she and her husband moved into the neighborhood. We became friends because of our common interests in cooking and crafting. We have shared a lot over the last 10 years including our sibling dogs. When they go away we take Daffodil, when we go, they take Andy.


Each of our pups is at home in which ever house they find themselves.

Over the years I have taken on different crafts and each time my friend has already done that and has supplies tucked away in boxes related to that craft. When I made Jewelry in 2009 she gave me boxes of beads. When I took up card making last year she gave me stamp sets, ink and lots of paper. A few weeks ago I got into mixed media and she gave me two large blank canvases. Although she had tried it, painting was not her forte. She did ask that I might create one of my mixed media pieces to put on the wall in her house.

So this past week while they were away and we were dog sitting I created "dogs on a beach run" using one of the blank canvases. I hope it is what she had in mind.


Thanks for stopping by. If you want to subscribe to my blog, sign up below ... At the very bottom of this page.


Tuesday, June 10, 2014

Cronie collaboration

I am calling this a cronie collaboration only because we have been friends for 55 years, not because we are old, by any stretch of the imagination. Last visit to Connecticut my very talented artsy friend and I decided to try a collaboration of art. We would each send one another the beginning of a project and it was the other's responsibility to complete it. Yesterday I received this in the mail:

Giant tag and flash card


I haven't seen a flash card in years, I wonder if she found it at a tag sale. Anyway, I had to start on my project immediately. OCD.. I do more cards than other art, and that was a really big tag for an A2 card. I either had to go big or go double. I decided to go big.

The flash card was two-sided. On the reverse was 3 x 9. I cut out the 2, 3 and 9, not sure where I was going exactly.. But once I flipped the 9 and had a 6, I figured I was as wise as an owl. I just got my chatting whoots stamp from Art Impressions last week, so I stamped and colored them with prismacolor pencils and Gamsol then cut them out.

I used the silhouette cameo to sketch and cut the "Seriously, who gives a hoot" on a velum call-out and used my printer on musical pattern paper to print out words relating to school as well as the congratulatory banner.

Lastly I attached the tag to a piece of off-white card stock which I hinged and cut to size as a card base.

I think it's cute. If you know anyone graduating from elementary school. I have just the card.

Thanks for stopping by, if you want to subscribe to my blog, enter your email address below and you won't miss a single post!


Sunday, June 8, 2014

Hip to Be Square

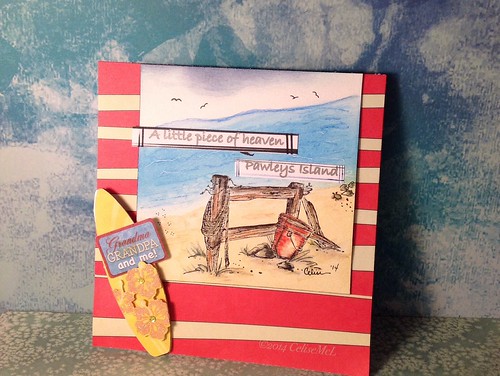
This week's Art Impression's challenge is "hip to be square". Which means the card base needed to be square. I used. 5 1/2 x 5 1/2 patterned cardstock from the Simon Says May card kit as my card base in red and beige wavy stripes. For the main event I used water color paper and used distress inks in antique linen, salty ocean, broken china and a wee bit of stormy sky to create the allusion of a seashore. Then I stamped the Art Impression fence post stamp using hero arts black ink.

We love our beach!

I colored the pail and fence with Royal water color pencils and used my water pen to blend. I wrote the sentiment with silver gel pen on my cameo and cut them out, outlined with black and blue markers and adhered them with craft tape.

I mounted the painting onto the cardstock with foam strips. I found a boogie board in my stash and attached a cute sign. "grandma, grampa and me" and adhered it to the bottom of my card.


Let the sun shine

This huge pinoak tree was cut down this winter in the front yard.


Now the late afternoon sun pours in through the dining room windows giving us excellent lighting all through the great room.

Also brightens up this normally dark and drab alcove and shows off the paintings that hang there now..


Perhaps it could be a new home to those mixed media creations forming on my brain.....


What do you think?


Thursday, June 5, 2014

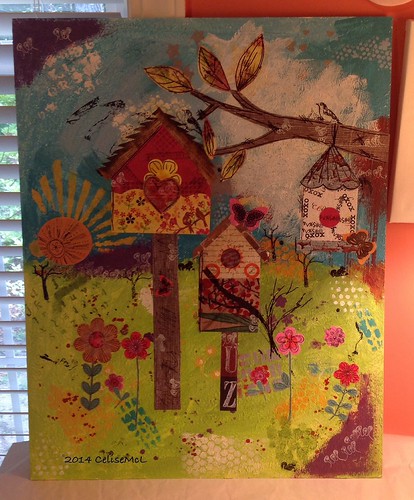
Mixed Media Birdhouses


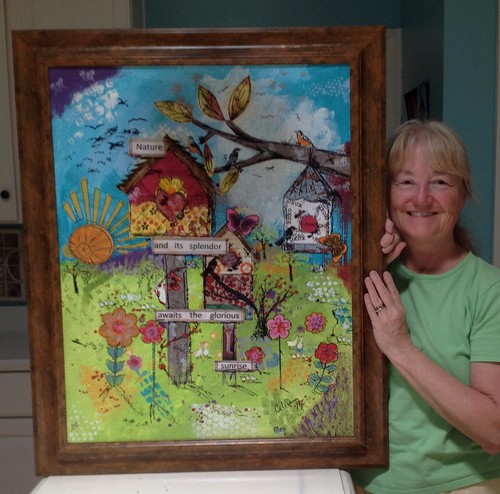
I got a wild idea one early morning last week to do a mixed media project of bird houses. When I was visiting my childhood friend Debbie in Connecticut last month we spent two days playing in her art studio. I got my first experience with mixed media art. It was so much fun. I am very much into recycle, repurpose, reuse...

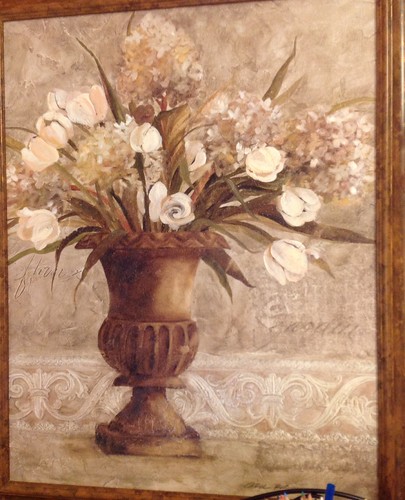
I started my project with an already existing print. When we repainted the dining room in 2012 my Home Goods purchases went into storage until last week when I decided to put them to good use.

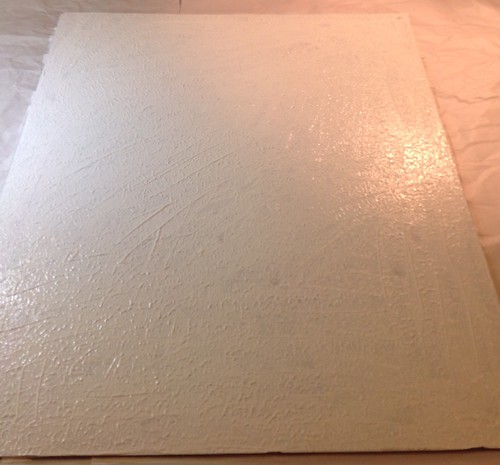
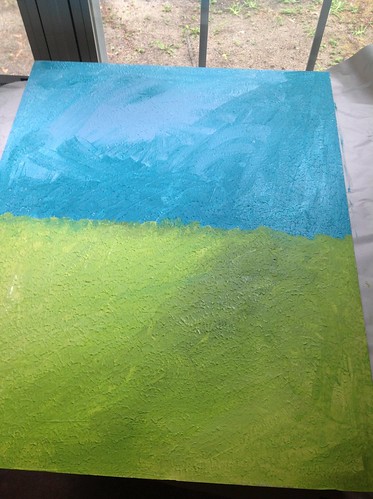
I unglued the backing and removed the print from the frame then applied a thick a thick layer of white gesso paint. When that dried I used acrylics in blues and greens to pain the grass and sky.

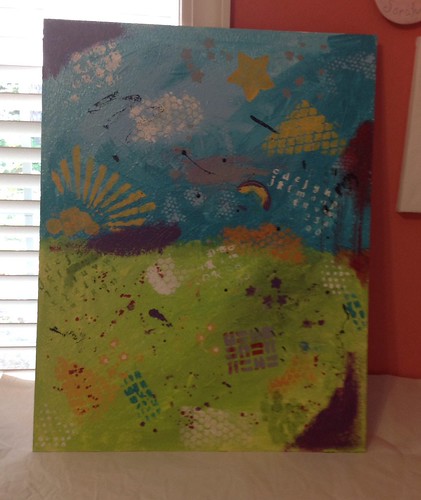
Then I used every stencil I owned with all the colors in my acrylic paint box to create a background.

It was looking pretty wild until I started applying the patterned paper shapes with modge podge. Then the picture began to take on a personality.

Adding some stamps, more paint and a lot of sharpie black marker it was ready for phraseology and reframing.

I have another print ready for the next project. Whatever it may be.

Wednesday, June 4, 2014

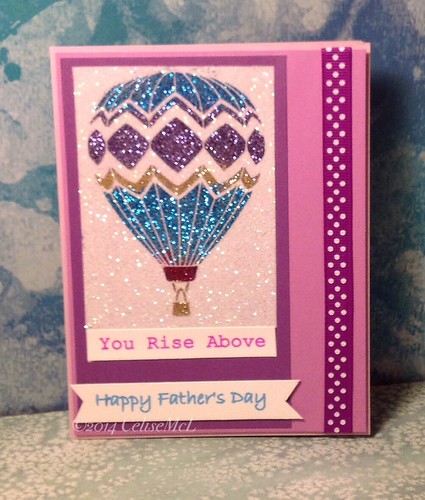
Father's Day for a Special Guy

This is a special card for my special friend who is a great father. Despite endless challenges you continue to rise above it all. Happy Father's Day to you.


I am entering this card in two challenges:

  • CASual Friday CFC132 what a catch
  • Simon Says Wednesday Father's Day

Tuesday, June 3, 2014

Happy Retirement

I have been creating a few tags the last few weeks in classes, they are hanging proudly on the board awaiting their turn to play. Mostly they were created to test out blending of distress inks. A couple were just fun decoupage.

The retro sketch is week has shapes resembling tags, so here I can use 2. One distress blending as a background and a decoupage in the foreground.


I used some of my old Simon Says monthly kit patterned paper for the background page and strips. The best wishes sentiment is from a fiskars stamp set. I used brads and buttons to anchor down the happiness at home bird tag.

The sold-by-the-spool brand ribbon was wrapped and tied through the tag hole. This card would be perfect for someone retiring from their lifetime employment. It is definitely me. I find great happiness at home.

Sunday, June 1, 2014

Busy day.. Little progress

Yesterday I got the second layer of paint on the canvas... I use various shades of blues for the sky and greens for the grass. I let that dry overnight and today I finally got into my workshop to start adding dimension.


I used pretty much every stencil in my drawer and every color of acrylic. Believe me, it will get better every day, this is just the beginning.