

I have a 2007 Volkswagon Pasat. I bought her new 6 1/2 years ago. She has served me well; 68,000 miles and still going strong... However, she is very finicky, does not like extremes at all. I learned very early on that my car became defiant when the outside temperature reached 100 degrees. We were driving in beach traffic from Annapolis to Delaware on a Saturday morning in late July 2010 (what were we thinking?). The temps on the east coast that summer were well over 100 degrees, my Pasat just dies, right there on the highway. Scary? You bet. Fortunately, she started right back up again and was ok from there. But it was a warning. Once again I was driving somewhere locally the next summer and came to a stop sign. Dies. I look at the outside temp, 100. She says take me home and leave me in the garage, I don't want to be here.

I always figured she was German engineered and partial to colder temperatures. Wrong. I learned recently, with these extreme cold temperatures, she really wasn't happy in either spectrum. I am so used to starting her up, putting it in reverse and backing out of the garage. NO! The noises that came out of the dash board were relentless. The message screamed "STOP THE CAR!" Didn't take me long to figure out she was cold, and like any old bird, it takes a while to warm up those joints before we can move. So I learned to go out to the garage a few minutes early and let her drink her morning coffee before heading out.
We are getting along much better now that we have a mutual understanding and that's good because we're in a relationship for the long haul.

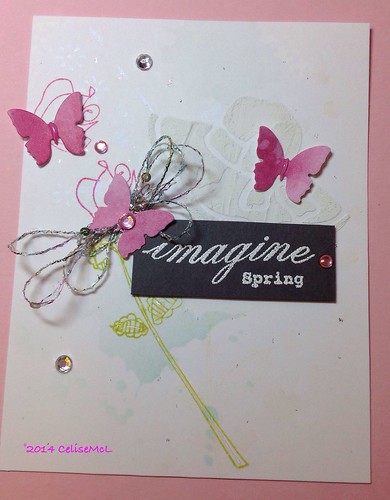
Today is all about embossing pastes for texture. I need more practice with this technique. I found an very old stencil in my stash. It is an Easter bonnet so for kicks I thought I would try it with the paste. First off, I made my own paste with talcum powder, glue and acrylic paint. I didn't want to invest in the product if I wasn't partial to the technique. On the white card stock I created a background with some opalite iridescent ink and very light baby blue blotches. I also spattered a few specs of silver glitter glue. The demonstration card by Debby Hughes was very ornate with lots of parts. Mine not so much. I die cut 3 pink butterflies and heat embossed the sentiment. With this unusually cold weather I thought it appropriate. When the paste was dry I stamped the pink roses with green stems and mounted all the parts. I tucked some silver yarn behind one of the butterflies adding a few gems and glossy accents for sparkle.
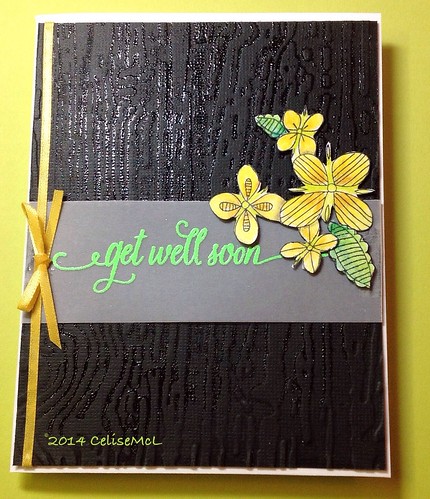
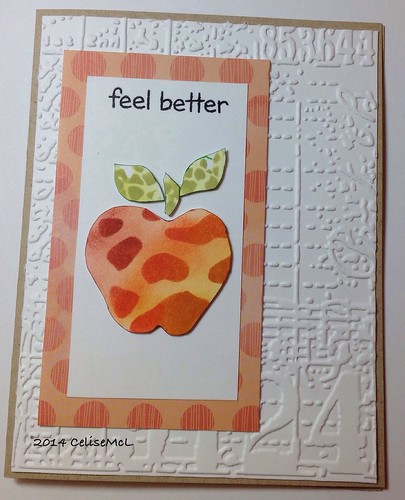
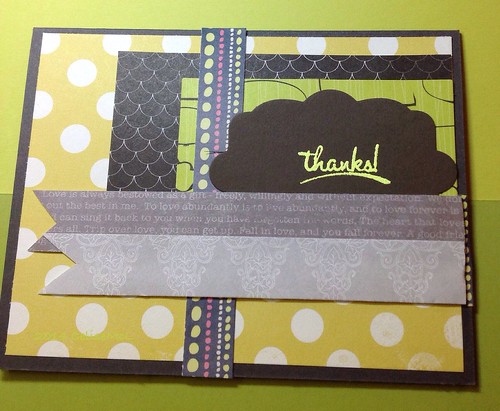
This second card was supposed to be translucent embossing paste but I don't have any, nor was I able to make it so I used my bark pattern embossing folder with Versamark ink, clear powder and the heat tool. I stamped and colored the flowers and leaves with prismacolor pencils and used Gamsol to blend. The get well sentiment is stamped on velum with Versamark and embossed with Zing spring green for a big pop of color. When I mounted the velum I could see the clear tape, so I added the ribbon for camouflage. Then added some wink of Stella for some shimmer.
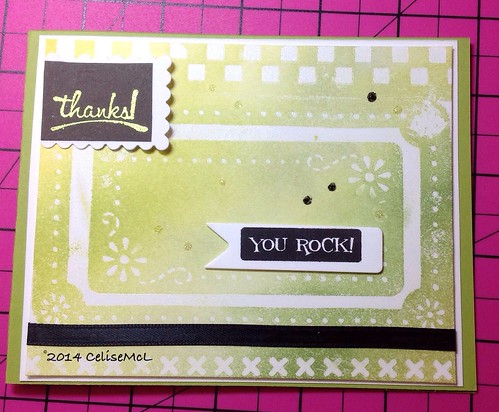
Again we are looking at translucent embossing paste to resist distress ink. I still can't play along, but I can improvise with Versamark on the stencil. I decided to use a dauber, to place the ink through all the holes and clear embossing powder. It came out ok. Notice I am I to greens today. I had already done the "thanks" with the Zing florescent powder, added a postage stamp die cut and "you rock" just because it was black. Again I added some black ribbon, not to hide a fault, but to help balance the card and dabbled on some drops of glitter glue.
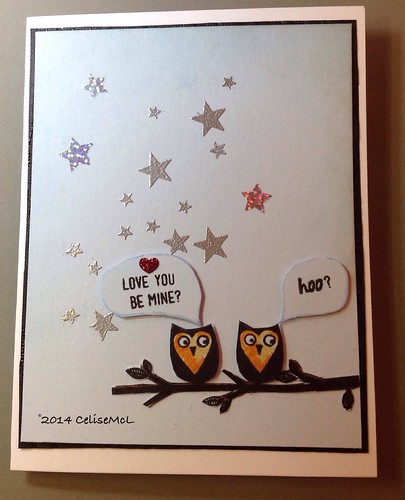
The finale was to use embossing paste to create a starry background. Total failure! The paste oozed everywhere, yech. So I resorted to the old standby.. Versamark ink on the dauber. I did the stars with silver embossing powder. I always get a kick out of the Geico commercials so I did a play on the owls. Too cute! I stamped the branch, owls and sentiment on the same color card stock as the stars, colored them with markers, cut them out and adhered them.
I also did a card this morning for a weekly challenge. Green? I guess I need some Spring.
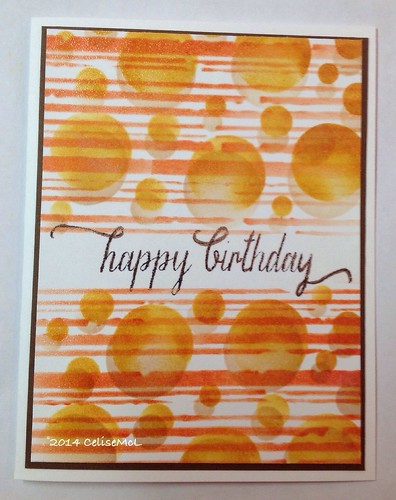
I finished my homework before class this morning. This birthday card was created using two stencils. One with circles which were offset and the lines was done with aTim Holtz stripes stencil. Colors are desert sand, tea dye and morocco orange. The sentiment is a hero arts stamp in stazon brown. It did not stamp well so I went over it with a brown prismacolor fine tip marker. I used clear embossing powder on the entire card and used my heat gun for the shimmer.
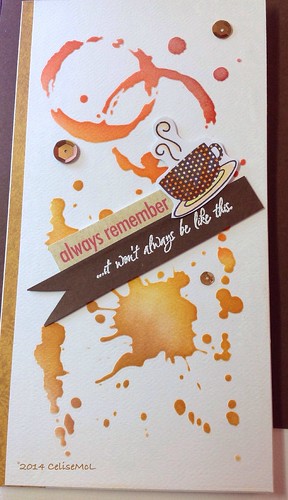
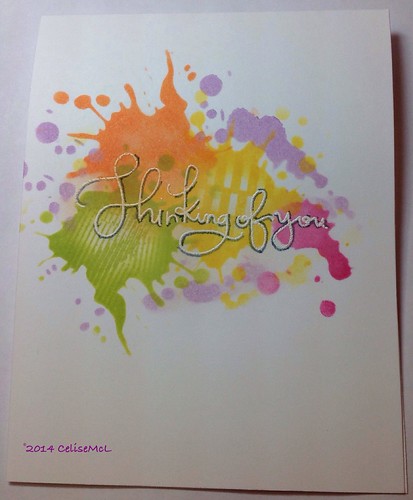 This card was so much fun to do. First I used Versamark ink for the sentiment and heat embossed with white powder. Then using the Tim Holtz splatters stencil which I was so fortunate to find at my local scrap booking store before the class began. The colors are pear tart, dandelion yellow, rose bud, orange and pansy purple. I used a couple of border stamps and then daubers to blend the colors. The orange ink was a color box pigment ink that would not come off the stencil. I thought I had ruined it. It covered up the embossed image too and would not come off with a baby wipe. I tried alcohol on the stencil and luckily it removed the stain. I remembered I had a chromatix alcohol blending pen and used that to remove the orange from the sentiment. It worked. As suggested in the class, I used a distress marker to give some shading to the "thinking of you" to help it to stand out. This is one really cool stencil, I think it will be a go to for me in the future when I want a messy back ground.
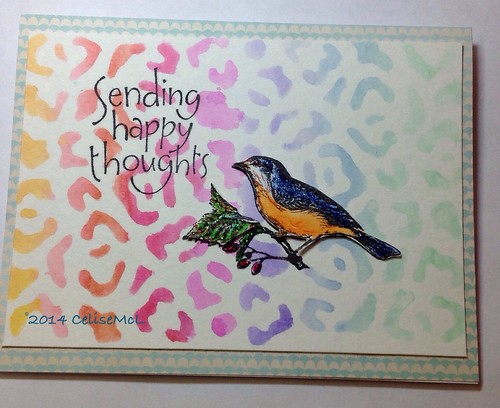
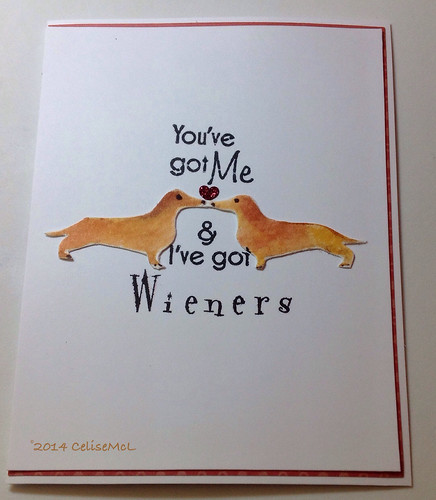
The next two cards were done using water color pens on water color paper. The background stencil to the right was about half the size of the page so I had to move it to complete the scene. The bird stamp was one of my first purchases when I started making cards last summer. I cut out the painted image and attached it to the background with adhesive strips. I used a border paper that came in this month's card kit from Simon Says Stamp. The next card was based upon Laura Bassen's hot dog card. I used the negative space of my dachshund die cut and water color pens. I flipped it over to get the mirror image. I got a kick out of the sentiment. Looks just like Andy and Daffodil.

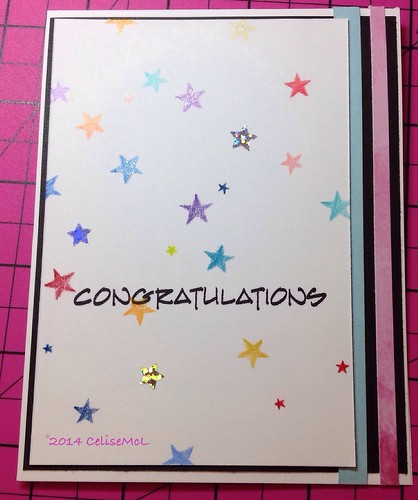
Tracing stencils. Using colored pencils to color inside the lines of the stencil. This next card was relatively simple. I used a Heidi swapp stencil to color in the stars, added a few silver embellishments, wink of Stella and a glitter pen. Added a couple of side stripes for accents.
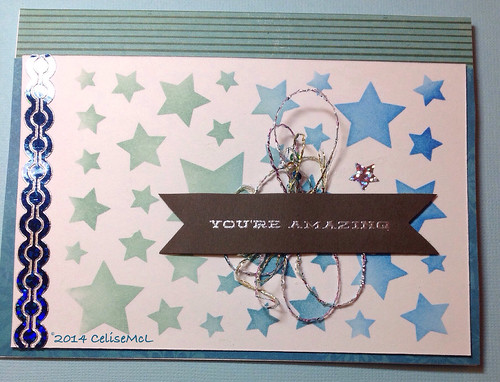
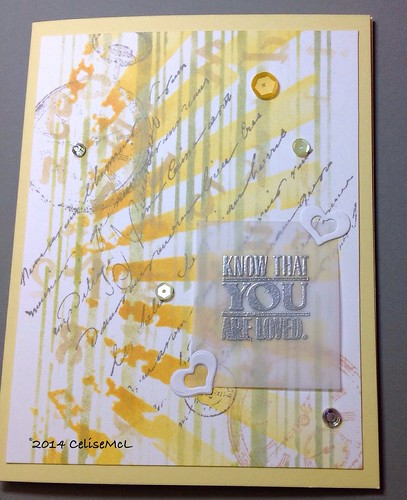
Sticker stencils. Using the negative space of your stickers. I don't have a bunch of stickers, but knowing now that I can use the negative space, I just may start looking for them. The only stickers I had were my stars so I used it. Unfortunately I did not de-stick the backing enough, so that when it came time to peel, I ripped it. Oh well one use only. I used distress colors of salty ocean and broken chin followed by versa magic oasis green. The stamp came from the Simon SaysLove This set which I embossed with silver powder. Taking my cue from Julie Ebersole I stuffed some silver twine behind the banner. I used a couple of printed sheets as backing and embellished with a teal dazzle border. May have been a little too much dazzle.
That completes day 2. I've been at this since before 8 am. Like a day at the office, but lots more fun. Until tomorrow!

Misting with ink spray.
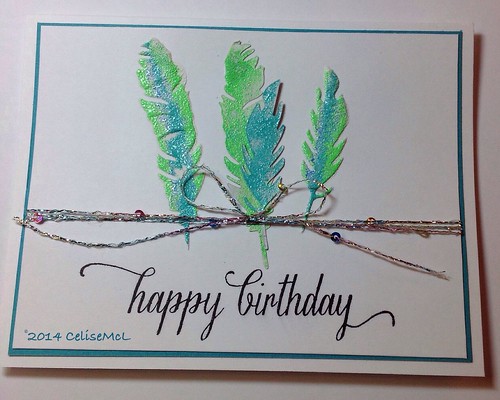
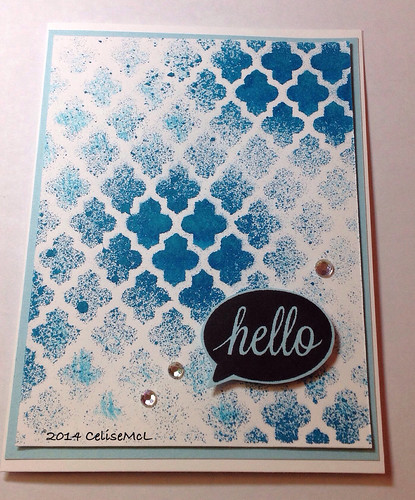
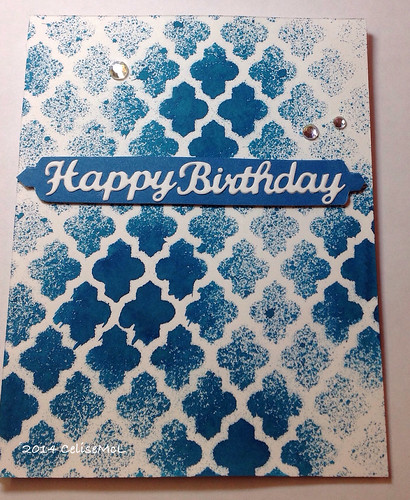
I need some practice with misting. I love Julie Ebersole's videos. She is such a hoot. She gave some great tips on how to keep your work surface clean, by using a spray box, I was able to contain the ink spray and didn't get any on my clothes. But, my fingers are now permanently blue, stencils are clean though. Oh well. The card, right, is my third attempt at spraying, did not come out half bad. I used my hero hearts hello stamp with black ink on light blue cardstock, then cut it out. Embellished with a couple (3) clear gems. Below is the card I decided to make using my second attempt at spraying once it had dried. I used my happy birthday die and glued it to a banner formed to the same design as the stencil. Despite the blue fingers, the cards came out ok. Cannot say for certain that I will be partial to this technique, it is a bit too messy.
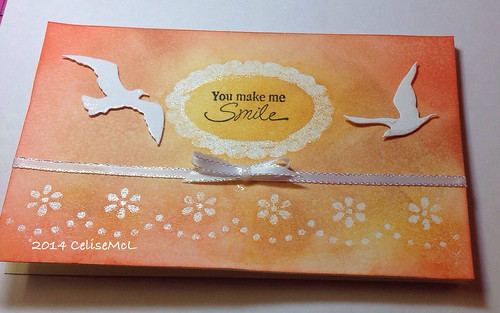
Distress ink is marvelous with stencils. I used a Martha Stewart adhesive stencil for the oval and edging and a Versamark pen then embossed in clear. The distress inks are wild honey, tea dye and ripe persimmon. I attached the bow with glossy accents and mounted the white birds cut with my impression obsession die. You make me smile!
So happy to get this class started. INKING & MASKING
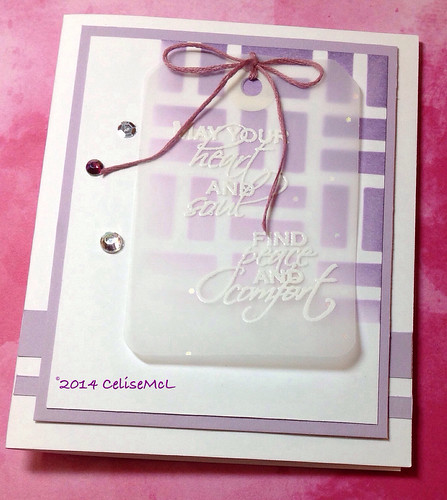
First card, sponging. Used a brick stencil with spring pansy and dusty concord inks. Velum tag with white embossed sentiment. Added lilac cardstock backing and embellished with sequins and gems. Bow was tied with embroidery thread. I used a little bit of hair gel to get the thread to behave. This card was modeled after Debby Hughes "have faith" card.
So today was the end of week 2 at weight watchers. My success was not as measurable as week one, but I am still descending. I really did not expect to be able to be back at goal in two weeks. But, I was hoping for more than 1/2 pound. Grrrrr.
Lesson learned. I cannot take anything for granted. If I don't pay attention, close attention, to what I am consuming, how and when I am consuming it, the pounds are not going to fall off by themselves. I should know that already. Weight loss is not an event, it is a process.

Had popcorn for lunch today, we went to the movies, saw Jack Ryan, Shadow Recruit. Although popcorn is on the WW power food list, I don't think the movie theatre version is all too healthy.
Good action movie, great on the big screen. Senior discount and matinee rate. $5.50. Can't beat that.
I do love jigsaw puzzles. I prefer the 1000 piece puzzles and better yet, those with unusual shaped pieces. I do not, however, go for impossible designs, like where's Waldo or a collage of nothingness. It has to be a painting or photograph, something worth looking at day in day out during the process of construction.

When we were up in the mountains last week, our friends brought this dachshund jigsaw puzzle. Our puppies, Andy and Daffodil are litter mates, and they are half doxie. We were only there for a little over a day and this puzzle was a wee bit too challenging for that short a visit. We barely completed the border. So I brought it home to finish.
Sunday I took it out of the box and began reconstruction of the border and set up the pieces by color. I use a heavy poster board as my base rather than placing directly on a table. This makes for quick relocation in the event I need to use my dining room or if company is coming.
I used to have other boards for the pieces, but I was unable to find them this week, so I confiscated the covers from the Christmas bins. Since I separate by color onto these covers I can transport them one at a time with me in front of the TV and put them together; then later integrate the blobs back into the main puzzle. Avoids having to sit or stand at the table for long periods, saving my back and neck from strain.
When I finish this my friend is going to glue it together and take it to the Vet's office. It is such a cute picture. At my current rate, it should be done by the weekend. Like everything else with me, it is so addictive. Just one more piece....

OK, after one week back on Weight Watchers... I lost 3 1/2 pounds. Yay. Good start. Cannot say I was an angel this week, but I did pay attention to a few basics.

#6 was probably the most difficult for me. I am one of the fastest eaters in the world. I consume food without talking, breathing, chewing... I never give enough time for my stomach and brain to communicate with one another, hence I don't know I am full until I am over stuffed. I attribute this fault to being raised in a large family and loving to eat. If I didn't eat fast enough, there wouldn't be any food left for seconds. As a youngster (until I was 30) I had a super high metabolism, I could eat any and all food and not put on weight. It was great while it lasted.
Week 2 I plan to concentrate on healthy meal planning and slowing down. I don't plan to change my lifestyle, losing weight is not that important. I want to learn to fit healthy and smart eating into the way I live. I.e., the wine cooler is still fully stocked and there is plenty of chocolate in the freezer.
By the way, Happy Birthday, John! We are going out to dinner, so tonight will be a challenge. One thing for sure, No cake today, he'll celebrate with a bowl of ice cream, that is his preference. Phew, dodged another bullet. Until next week...

We are spending a few days with our pups and human friends at a dog resort in The North Carolina mountains. It is a beautiful restful place where the dogs have 8 acres to run and play. They are exhausted. While here we did a downtown city walk in Asheville and lunch in Hendersonville.

At the cabin we have a fully functional kitchen and living area with TV, fireplace and hot tub. Nice place. We started a 1000 piece jigsaw puzzle on the first day. It was really difficult, not going to finish it before we leave. Will have to figure some way to pack it up without destroying all the work done so far.
The view from the porch is gorgeous. After a rain shower this morning the trees glistened like silver. The full moon over the lake tonight is spectacular.
The forecast shows snow showers tomorrow morning, that would give me my fix for the year. Time to head back to the beach tomorrow, I have some orders coming in soon, anxious to get into my workshop with my new toys.
There seems to be an App For everything. All you need is to know where to look. Some Apps are free, others are free with a caveat... Like "get me, but I will hound you to death with ads until you spend the $1.99 and buy me". I prefer to take the freebie, if I find it useful, I will fork over the cash, otherwise I delete it. Of course deleting it doesn't mean it goes away permanently, you can always retrieve it from "the cloud".
I have found some truly valuable Apps. One, of course, is this one... Blogsy. I can write a post or update a post directly from my IPAD, it doesn't matter whether your blog is Wordpress, Blogspot or any other, it has the appropriate API to handle them all. Another very useful App is Textastic. I can update my webpages directly to the server without FTP. That is a life saver. I prefer never to log into a PC unless absolutely necessary. When it was time to do our annual Christmas card I downloaded a collage App, Pic Collage. In a matter of seconds I was able to put my holiday photo together and ship it off to Walgreens for printing.

Today I used it to group a bunch of my DIM (did it myself) greeting cards together. Just to see what it looked like; Also to come up with a color picture to post on Today's blog post. Truth is, that was the real reason I did it. Posts need color.
I have noticed that many of the other card makers world wide use a water mark on their cards when they post them to web sites for copyright purposes. So I went looking for a watermark application. Sure enough there it was EzY Watermark... Free. Works too. It will be an added step, but I think it will be worth it should I ever become famous. Never know, in my wise old age, I believe anything is possible.
Today is Sunday, another day of Football playoffs. The result of today's games will determine who meets the Patriots and Seahawks in their respective conferences for the Championship. Good day to hang out in my workshop and listen to my sweetheart yell at the TV from afar.
I went back to WW (Weight Watchers) this morning after a 9 month hiatus. I believe Weight Watchers is a fabulous program for losing weight. Just like aerobics class is a great place to exercise. What do both of theses have in common, other than great health benefits? You can't cheat.
Someone is watching. If you don't show up, they know it. If you goof off, they know it. If you don't follow the program and pay attention to your eating habits, it shows on the scale. And someone will see it. Even as disciplined as I am, when it comes to food and exercise, if no one is watching, I will cheat.
Both my exercise regiment and weight watchers meeting are out of pocket expenses. I pay the gym monthly, if I don't go, I might as well flush $2 down the drain every day. For every week I stay above my weight goal, it costs me money. That too is an incentive. The sooner I get back to goal, the sooner I don't have to pay to stand on the scale.

3 years ago I dropped over 20 pounds and got rid of all my fat clothes. The past few months, I am struggling to fit into those skinny jeans and opting for elastic waste pajama pants. BAD! REALLY BAD! I stopped going to weight watchers because I didn't feel I was getting much help with maintenance, I stressed every month over 1 pound off goal. It was no longer rewarding to drop the pounds, I was content with my eating habits but beating myself up when the scale tipped the wrong way. So I quit.
As the months went on I wasn't worried about 3 or 4 pounds off goal, but then come the holidays, bam, it became 7 pounds. That is the size a newborn, no wonder my jeans are so tight. So I decided to put my tail between my legs and go back. I need to revisit my eating habits, I refuse to give up my life style, so I have to modify. For example, rather than wine AND chocolate, make it wine OR chocolate. My two biggest weaknesses!
This week the meeting focused on scheduling meals. Try not to go more than 4 hours without a meal or healthy snack. I can understand that seeing I get so engrossed in my craft activities I forget to eat, then I am so ravenous, I finish off an entire casserole, right out of the frig. Breakfast? I don't usually do breakfast until lunch time. I have some work to do between now and the next meeting. Check back on 1/16 and we'll see how I did.