
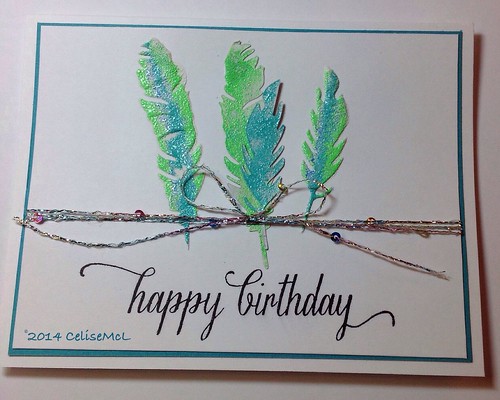
The first video of day 4's lesson showed us how to make our own stencils using scrap plastic and dies. I don't have a big die stash, but I did have these feathers so I created the stencil and used it to create the cool background. I stamped a hello bubble in the same color ink but when I applied wink of Stella .. it bled, so I stamped it again with stazon. Have to be careful with certain medium, it doesn't always play well with others. I like the look of this card. Lots!
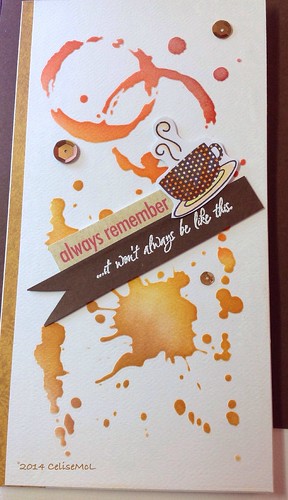
I used 3 distress inks, brick red, wild honey and tea dye to get the blended color on this splatter stencil. Someone mentioned that it looked like coffee stains. I used a brown stazon and stamped the coffee cup, colored with markers and cut it out. In order to make it look like it spilled, I put it at an angle. I used white embossing powder for the sentiment ..it won't always be like this and cut it out of dark brown cardstock to look like a banner. Feeling it needed something else I found these Elle's studio labels in the Simon Says February kit and attached this Always Remember to the banner. I mounted it to an 8 1/2 inch card base and used a brown bo bunny printed card stock for the left border and a few sequins for effect.
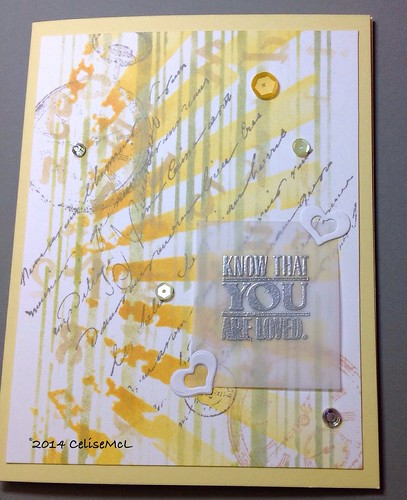
Sheri Carroll used various stencils with a Gelli plate and acrylics to get a great background for a card. I have no Gelli plate, nor was I interested in digging out my acrylics, so I used ink. I used 3 stencils to get the rays, stripes and letters/numbers. Then stamped a couple of stop watches and the French script. I used silver embossing powder for the sentiment onto some velum paper and anchored it with a couple of small hearts. Then placed a few sequins and gems, cut it to size and mounted on a yellow base.
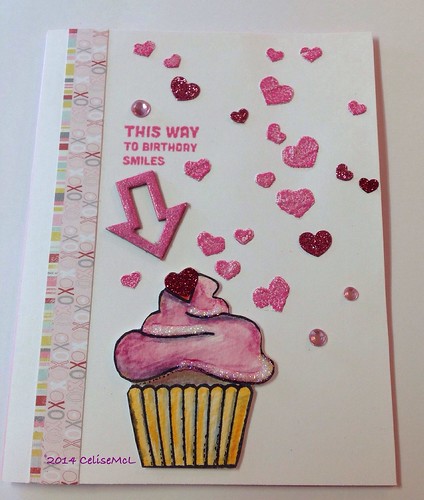
Since I was successful once, I thought I would try the falling heart stencil. Some of them turned out ok. I used reflections embossing powder for the pink tinge and used stickers to cover up splotches that did not quite work. I stamped and colored a cupcake and cut it out, then used the same pink embossing powder on a chip die arrow that came in my card kit along with the sentiment which I stamped in Memento rose bud. A border cut from a 6X6 card stock pack finished off the card. This will be perfect for my grand daughter's upcoming birthday. She is turning 5. Little miss pinkalicious.
Your cards were fun to look at. Good job.
ReplyDeleteBrie will love that card!!! Little Miss Pinkalicious. She'll probably carry it around the house with her for the next few weeks.
ReplyDeleteThe card with the feathers is gorgeous, I'll take it! ;)